Configuring DNS
This guide explains how to change OneFirewall Alliance DNS settings on the most common OS Windows, Linux, MAC iOS and routers provided by Fastweb, Vodafone, TIM, and WindTre.Menu labels may vary slightly depending on your router model, but the workflow is similar across devices. If your router cannot handle two or more DNS servers, please use only one OFA-DNS server and the Alternative as in the 3th DNS Server section
OFA DNS Servers
Please contact [email protected] for get configuration values and to enable your ISP Provider
3th DNS Server to add at the configuration
You can choose the one provided from you ISP Provider or one of the following existing DNS ProvidersWindows (10 / 11)
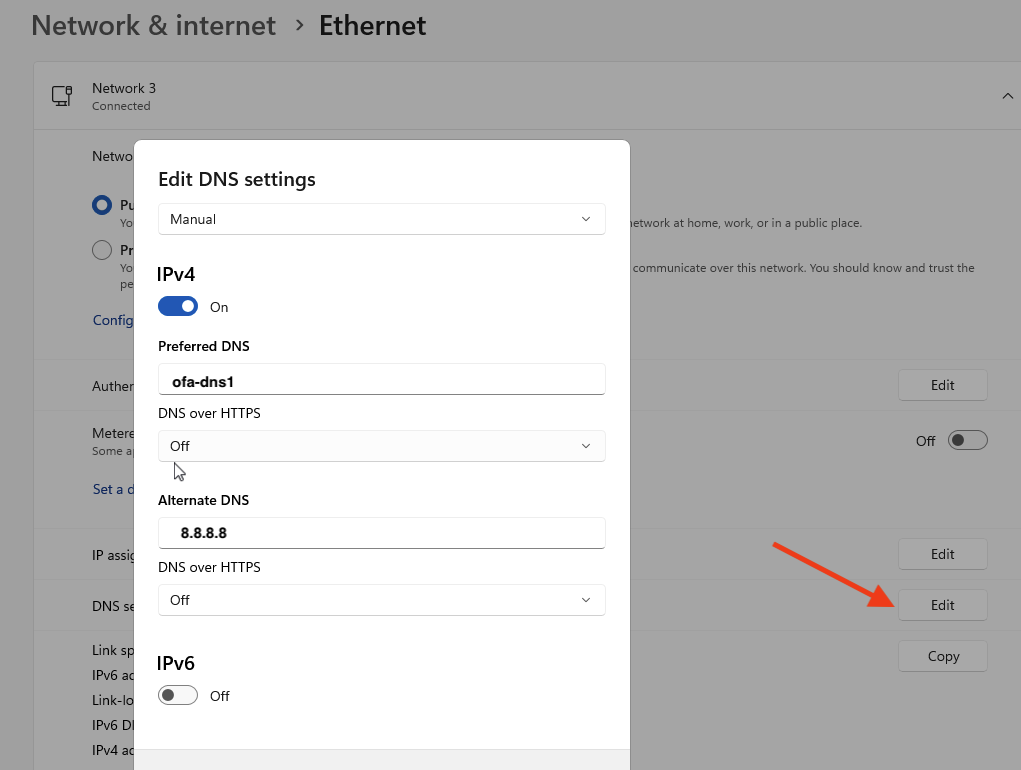
Using Settings
- Open Settings.
- Go to Network & Internet.
- Select Wi-Fi or Ethernet.
- Find DNS server assignment and click Edit.
- Choose Manual and enable IPv4.
- Enter your DNS servers.
- Save.
Using Control Panel
- Open Control Panel.
- Network and Sharing Center → Change adapter settings.
- Right‑click interface → Properties.
- Select Internet Protocol Version 4 (TCP/IPv4) → Properties.
- Choose Use the following DNS server addresses.
- Enter DNS values.
- OK.
Linux (Ubuntu / Debian / Fedora / etc.)
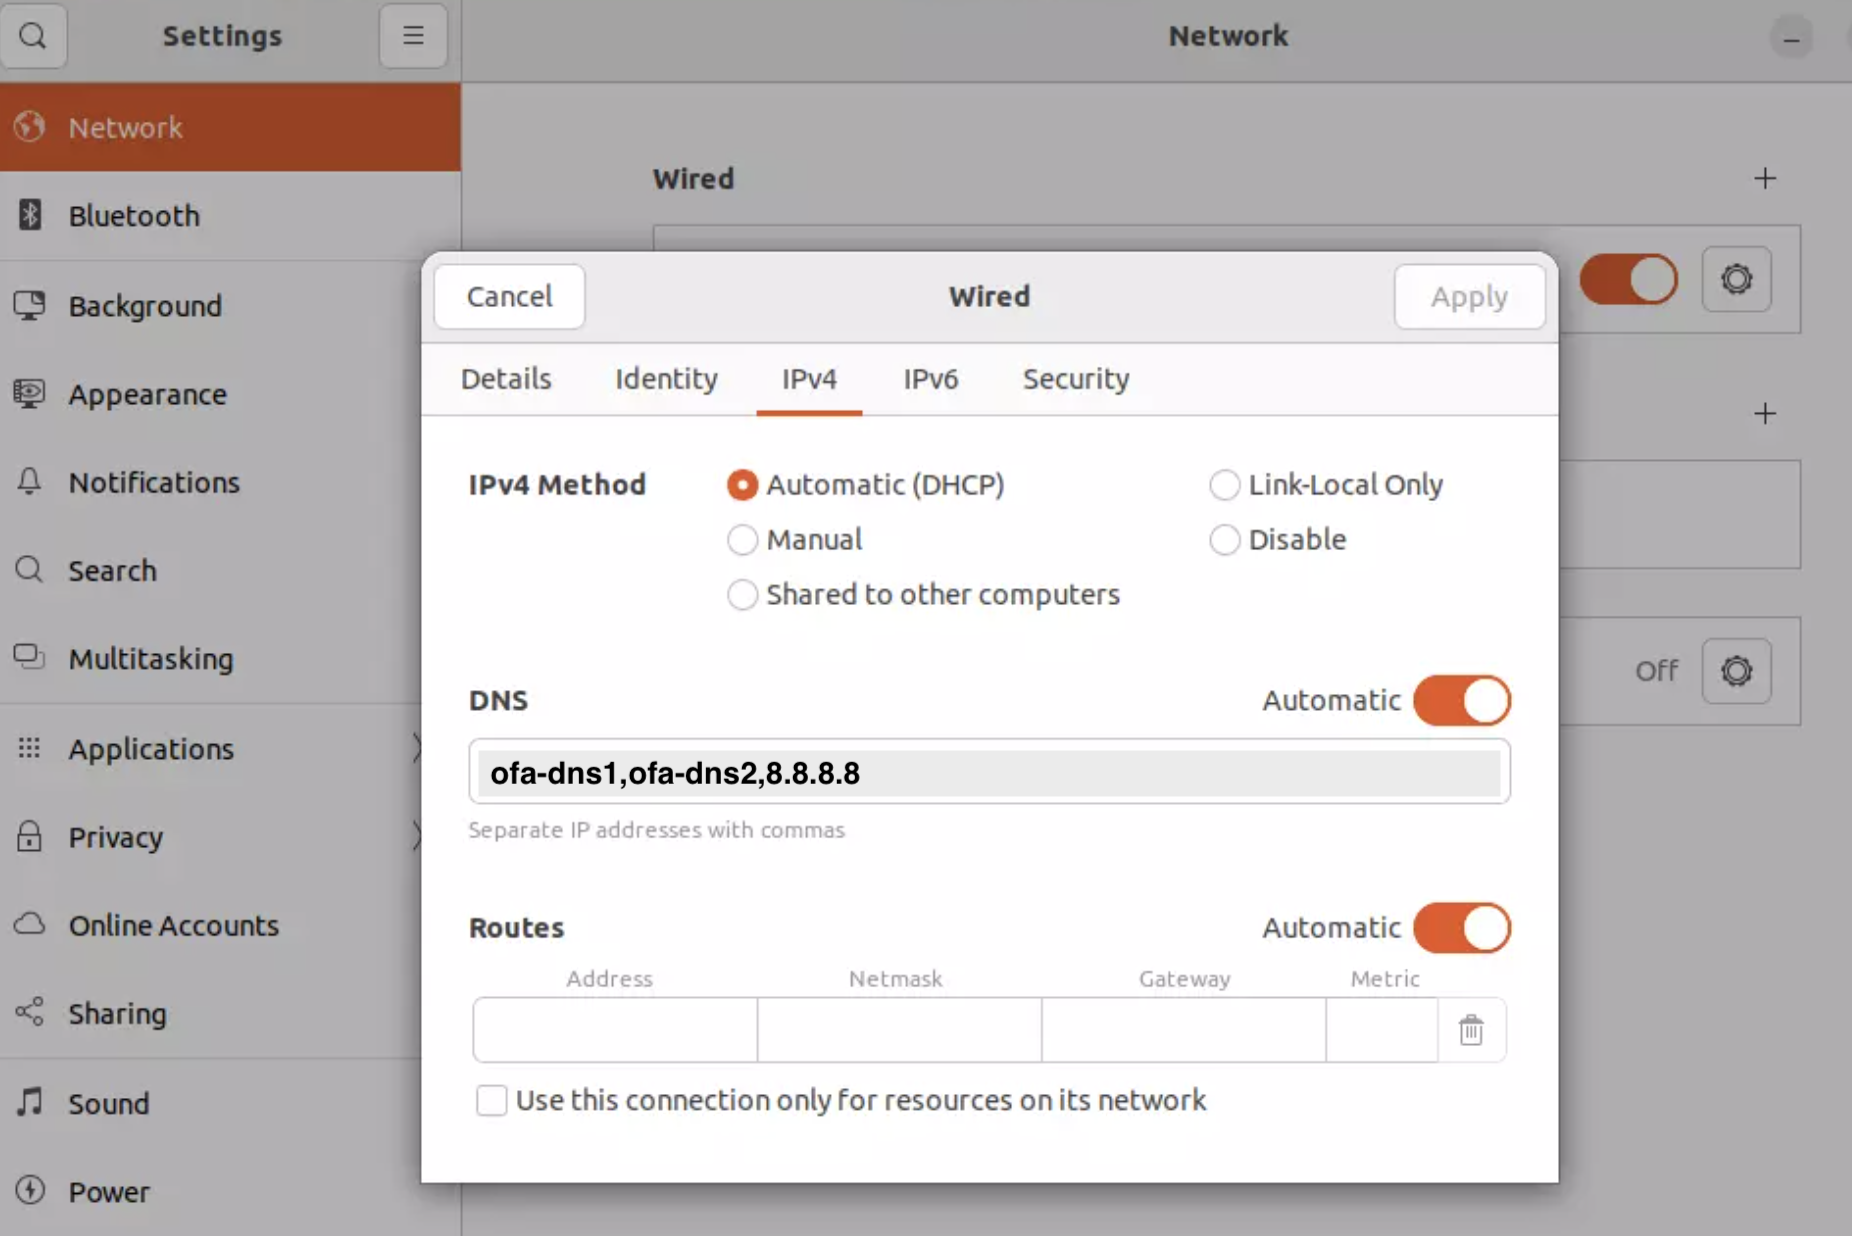
Method 1 — NetworkManager (GUI)
Steps
- Open System Settings (or System Preferences on older versions).
- Select Network.
- Choose your active connection:
- Wi-Fi
- Ethernet
- Click Details… (or Advanced…).
- Open the DNS tab.
- Click the + button and add your DNS servers.
- Example:
Method 2 — Netplan (Ubuntu Server)
Edit the file:Method 3 — resolv.conf (manual)
macOS (Tahoe / Ventura / Monterey / Big Sur)
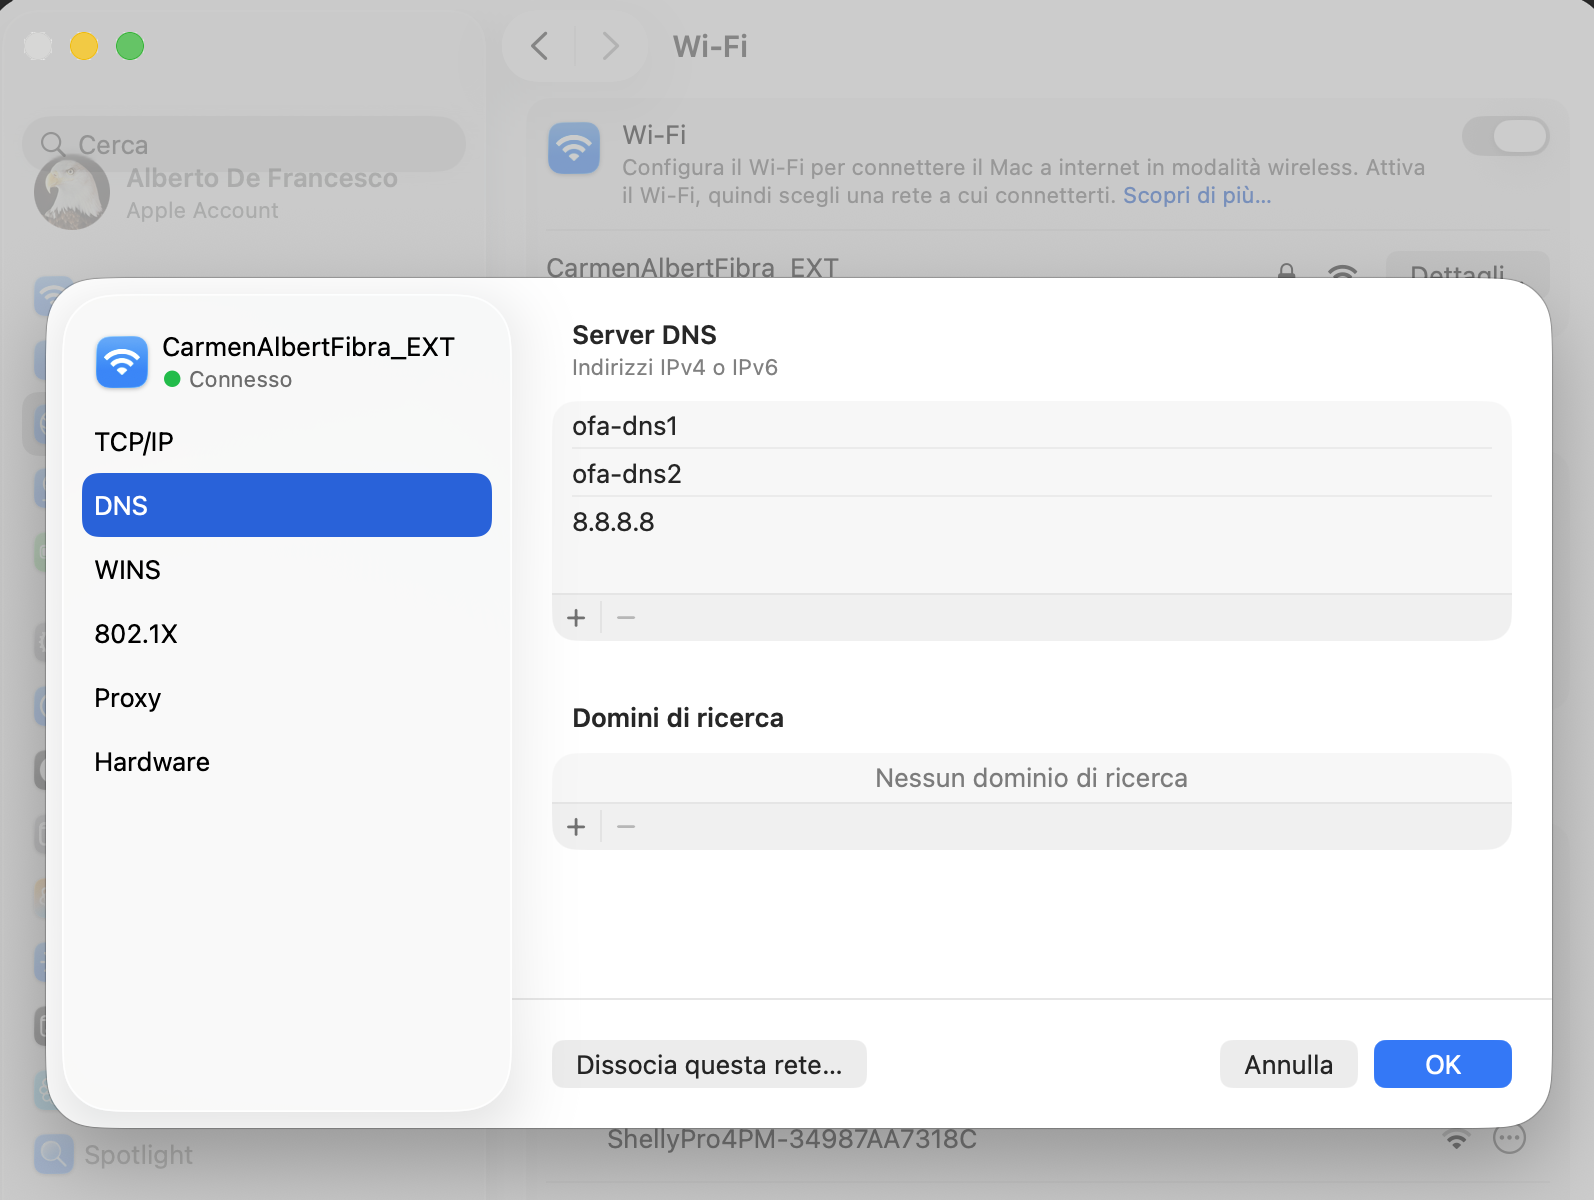
Steps
- Open System Settings (or System Preferences on older versions).
- Select Network.
- Choose your active connection:
- Wi-Fi
- Ethernet
- Click Details… (or Advanced…).
- Open the DNS tab.
- Click the + button and add your DNS servers.
- Example:
Fastweb Routers
:::warning Some Fastweb routers do not allow DNS changes on the WAN connection.If the DNS section is missing, configure DNS directly on your device or use your own router in cascade. :::
Steps
- Open your browser and navigate to:
http://192.168.1.254http://192.168.1.1
- Log in using the credentials on the router label.
- Go to Advanced Settings → Internet → DNS.
- Disable Automatic DNS.
- Enter your preferred DNS servers.
- Save and restart the router.
Vodafone Routers (Vodafone Station / Power Station)
:::warning Many Vodafone Station models lock DNS settings on the primary connection.If DNS options do not appear, use device-level DNS or a third-party router. :::
Steps
- Access the router via:
http://192.168.1.1http://vodafone.station
- Log in with the password printed on the router.
- Navigate to Settings → Internet → Advanced Settings → DNS.
- Disable Automatic DNS.
- Add your custom DNS servers.
- Save and reboot.
TIM Routers (Smart Modem, TIM HUB, TIM HUB+)
Most TIM routers allow DNS modification without restrictions.Steps
- Go to:
http://192.168.1.1 - Log in using the admin password from the router label.
- Open Advanced → WAN / Internet Settings → DNS.
- Turn off Automatic DNS.
- Input the DNS servers you prefer.
- Save and restart the router.
WindTre Routers (Home&Life, Zyxel, D-Link)
WindTre routers generally allow DNS configuration.Steps
- Open your browser and go to
http://192.168.1.1. - Log in using the credentials printed on the device.
- Navigate to Advanced Settings → Internet → IPv4 → DNS.
- Disable Automatic DNS Assignment.
- Enter custom DNS values.
- Save and run a reboot.