> ## Documentation Index
> Fetch the complete documentation index at: https://docs.onefirewall.com/llms.txt
> Use this file to discover all available pages before exploring further.
# FortiGate Integration Guide
## Purpose
This guide describes how to integrate **OneFirewall Alliance (OFA) Threat Feeds** into a **FortiGate Security Fabric** using external dynamic lists (EDLs). The integration enables automatic enforcement of security rules based on live threat intelligence from OneFirewall, covering both **inbound** and **outbound** traffic.
# FortiGate Compatibility for OneFirewall Alliance Threat Feed Integration
## ✅ Minimum FortiOS Version Requirements
| Feature | Minimum FortiOS Version |
| ------------------------------------- | ----------------------- |
| External Connectors (Threat Feeds) | **6.0+** |
| Support for Custom HTTP Headers | **6.2.3+** |
| Feed Auto-Refresh & Policy Binding | **6.4+** |
| Full GUI Integration & Advanced Logic | **7.0+** |
***
## 🔐 Notes
* **Custom Bearer token authentication** used by OneFirewall’s API requires **FortiOS 6.2.3 or higher**.
* Devices running FortiOS **prior to 6.2.3** can only ingest **unauthenticated feeds**, which is incompatible with OneFirewall’s authenticated feed.
* For best results, use **FortiOS 6.4 or 7.x**, which support:
* Secure external connectors with headers
* Feed auto-refreshing
* Integration with inbound and outbound firewall policies
* GUI-based management and logging
***
## Step 1: Generate API Token
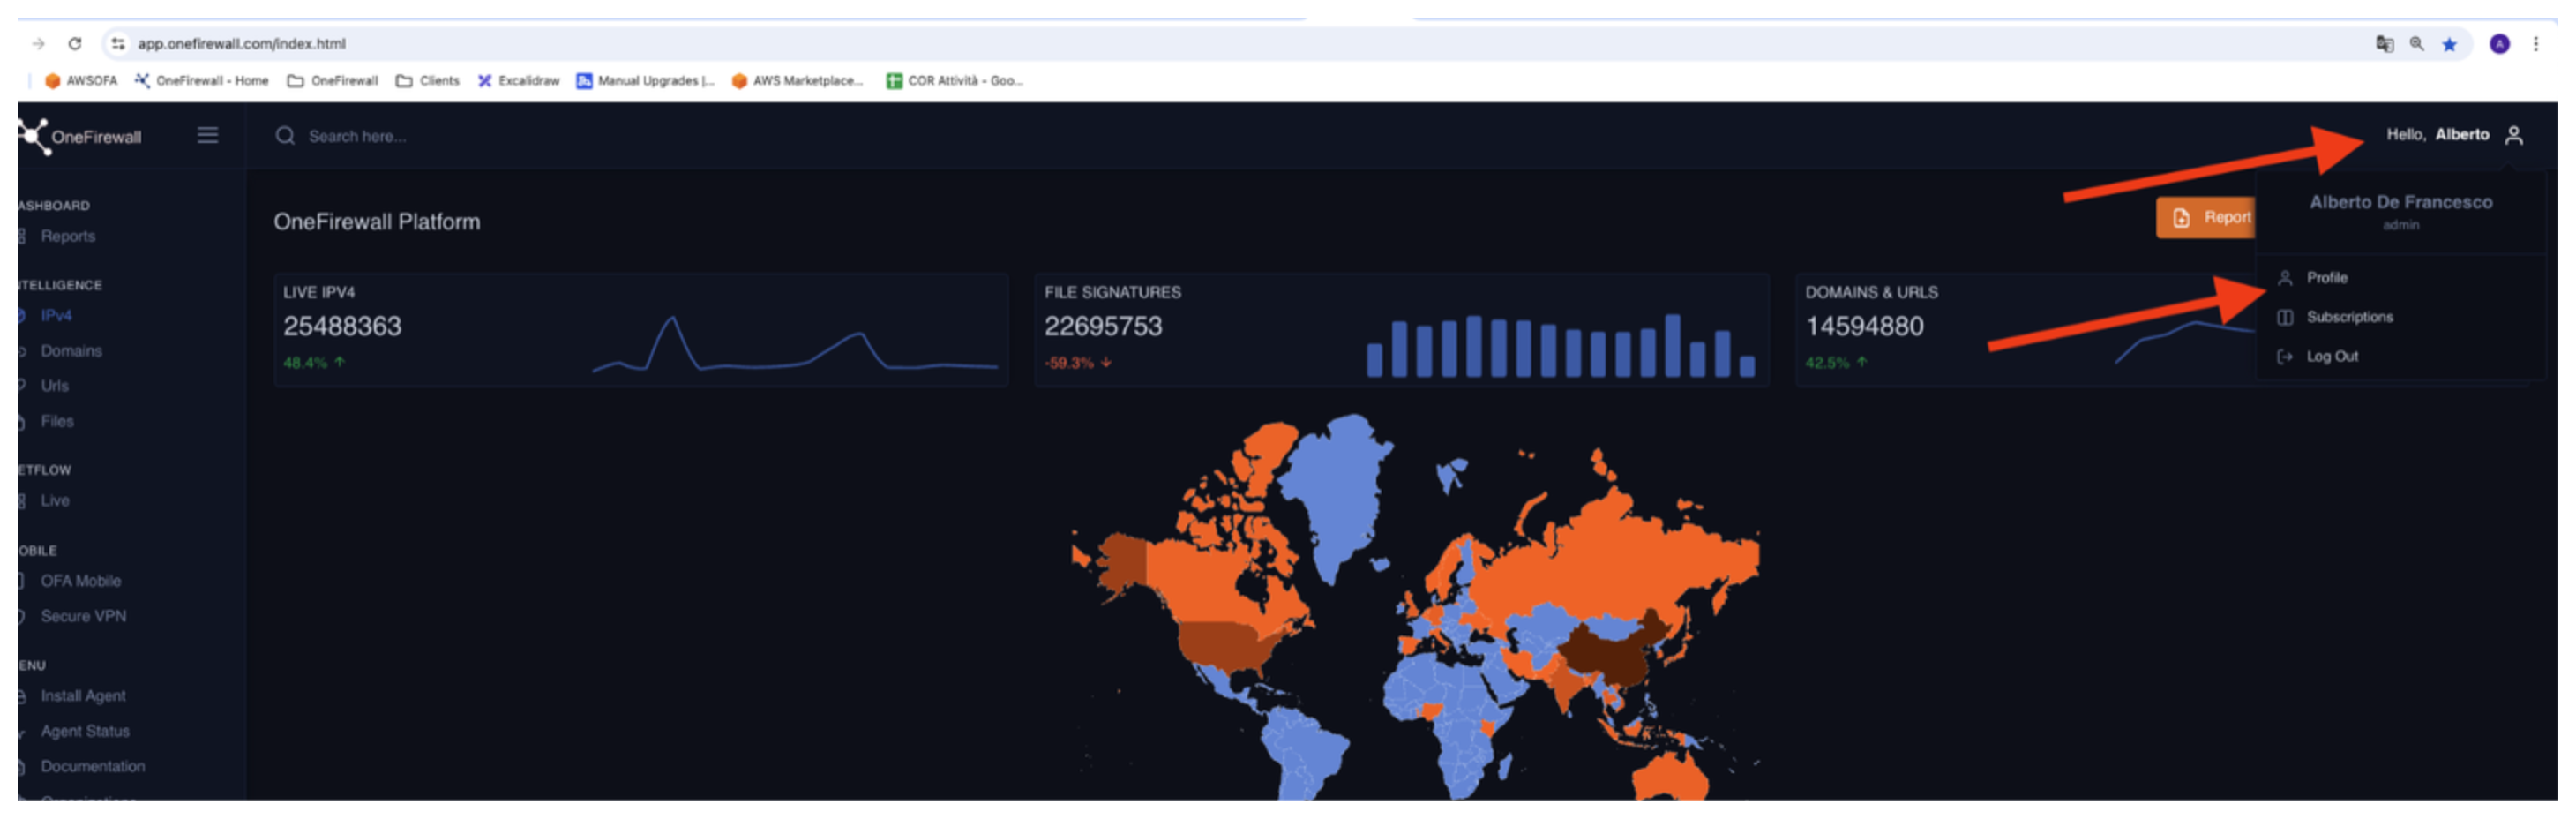
1. Log into your OneFirewall Alliance profile.
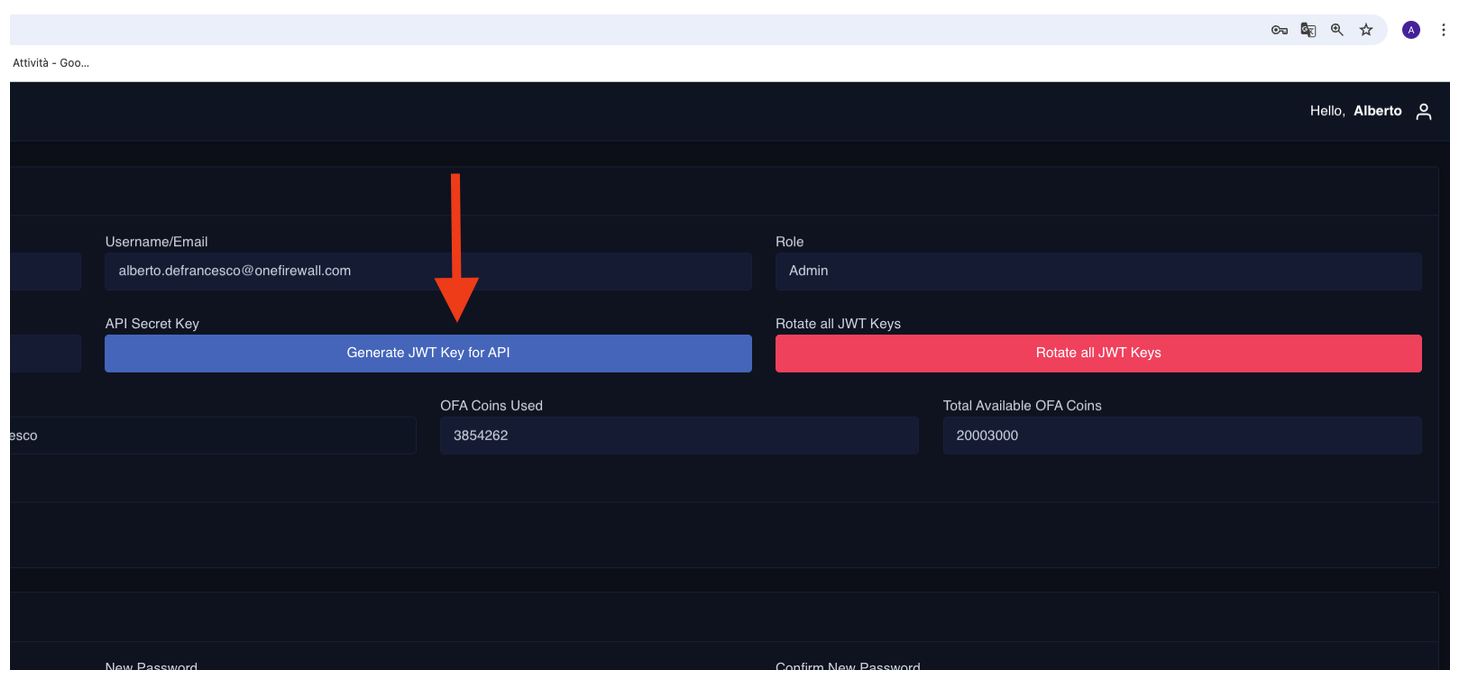
2. Navigate to the **API Access** section.
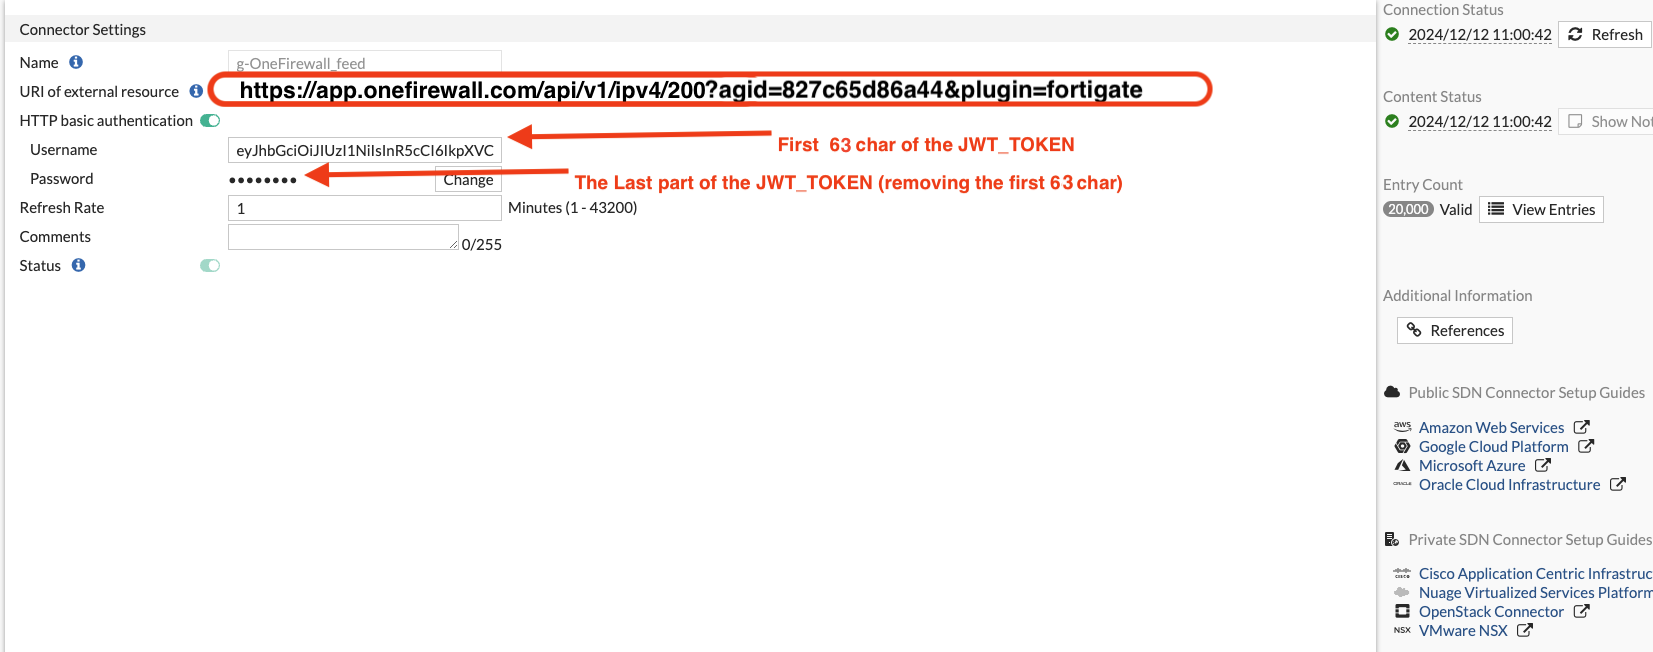
3. Generate a **JWT token**.
4. Save this token securely — it will be used for authenticating feed requests.
 ***
## Step 2: Configure FortiGate External Connector
1. Access your FortiGate device.
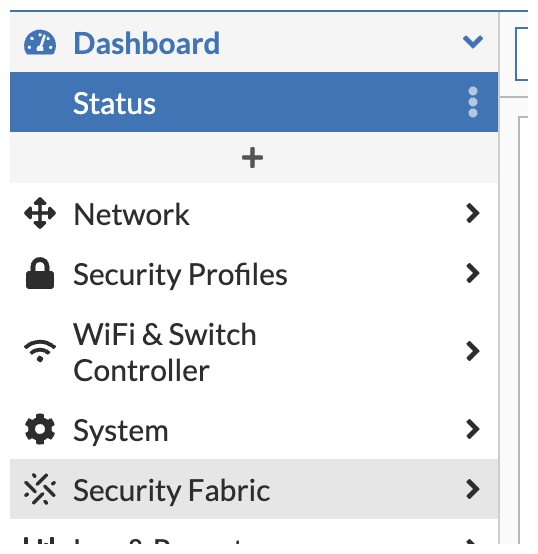
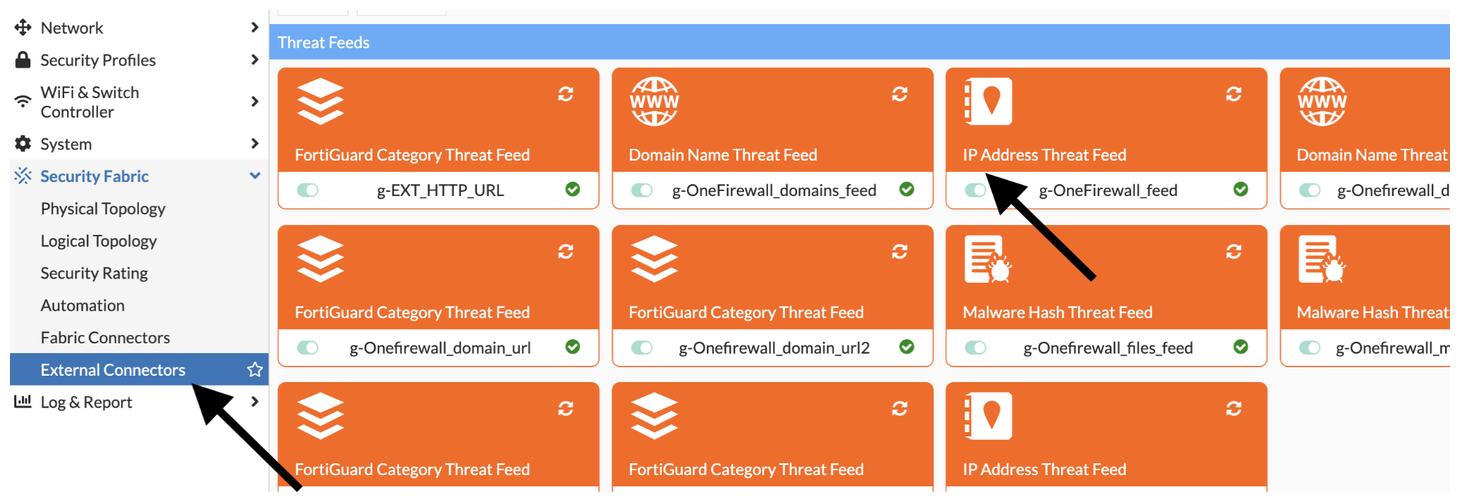
2. Go to `Security Fabric` > `External Connectors`.
3. Click **Create New** > Select **IP Address Threat Feed**.
4. Configure the feed:
5. Set update interval as needed (e.g., every 15 minutes).
6. Save the connector.
***
## Step 2: Configure FortiGate External Connector
1. Access your FortiGate device.
2. Go to `Security Fabric` > `External Connectors`.
3. Click **Create New** > Select **IP Address Threat Feed**.
4. Configure the feed:
5. Set update interval as needed (e.g., every 15 minutes).
6. Save the connector.
 ***
## Step 3: Create Security Policies
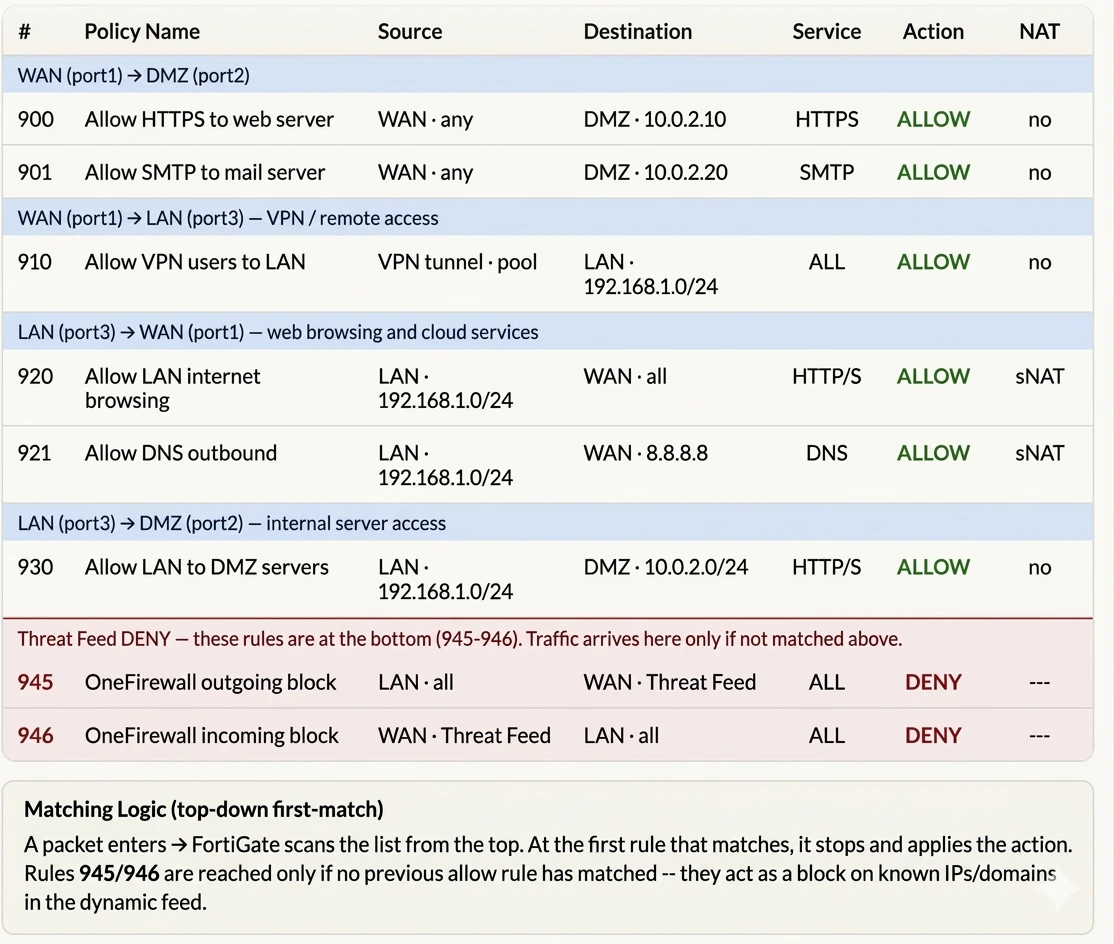
Now that FortiGate is receiving updated threat intelligence from OFA, apply it through security policies.
***
## Step 3: Create Security Policies
Now that FortiGate is receiving updated threat intelligence from OFA, apply it through security policies.
 here an example mapping **any** keyword to specific network interfaces