> ## Documentation Index
> Fetch the complete documentation index at: https://docs.onefirewall.com/llms.txt
> Use this file to discover all available pages before exploring further.
# Sensor Configuration
> How to configure your WCF Agent (Sensor)
The **WCF Sensor Configuration** includes a pre-defined JSON file that determines how your installed setup will instruct your firewall, router, or IPS device to behave.
There are two setup types in OneFirewall:
* **API-Based**
* **Agent-Based**
***
# API-Based
The simplest and most straightforward installation method.\
This includes systems such as **Fortigate**, **Checkpoint**, **pfSense**, and others.
Setup is as easy as selecting your device from the menu and enabling it.\
You don’t need in-depth knowledge—the system guides you through every step.\
We won’t go into detail here, as the process is mostly self-explanatory during installation.
***
# Agent-Based
This method applies to systems like **Checkpoint SecureXL**, **Sophos**, **Trellix**, and others.\
To connect these with OneFirewall for real-time protection, you’ll need to install the **WCF Agent**—a lightweight bridge between your device and the OneFirewall platform.
When you select a device that requires an agent, the system automatically generates a pre-compiled JSON configuration.\
You’ll need to review and edit this JSON before full end-to-end integration with your device.
## 1. Activation
Log in to your **OneFirewall Server** instance, open the main menu on the right, and click **Install Agent**.\
Select the device you want to activate, then define the following parameters:
1. **IoC Type** — Choose between *IP*, *URL*, *Domain*, or *File*.
2. **Cyber Crime Threshold** — Set the sensitivity level at which the device starts blocking threats.
3. **Sync Interval** — Define how often the agent should update its IoC data.
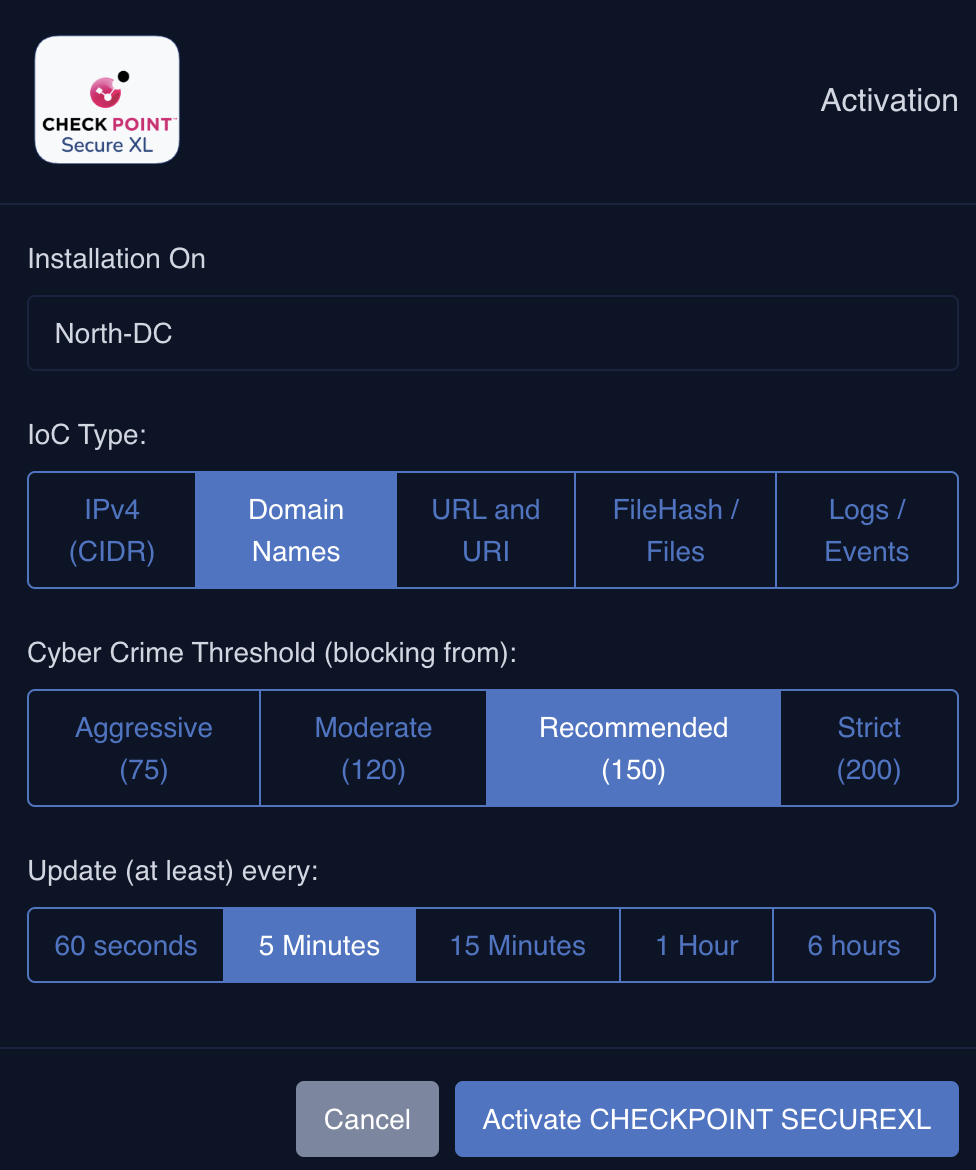 If the selected device requires an **Agent-Based** setup, you’ll be presented with the following form:
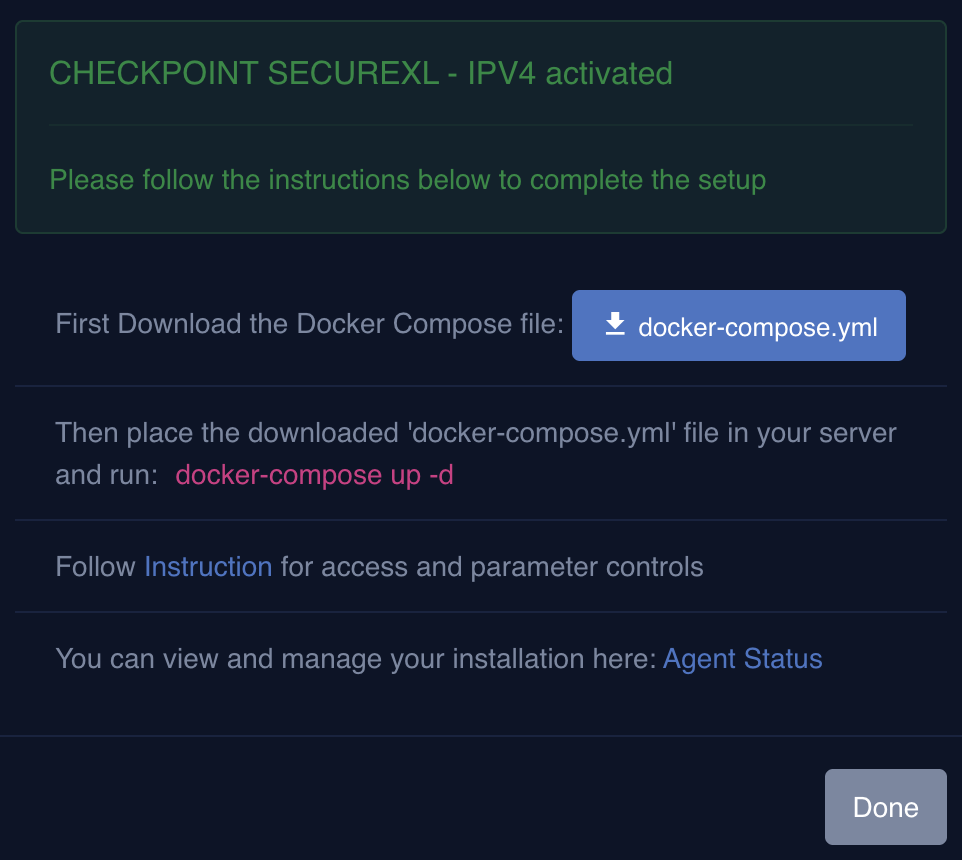 ***
## 2. Download Configuration
Prepare a **virtual machine** with **Docker** and **Docker Compose** installed.\
Download the `docker-compose.yml` file from the previous step and place it on the newly created machine.
This configuration file contains the necessary parameters (including your certificate) that allow the agent to securely connect to your OneFirewall Server.
To start the Agent, simply run the following command:
```bash theme={null}
docker-compose up -d
```
## 3. Setup Access
1. Navigate into the `Agent Status` page from the menu, where you can find the list of all installed Agents.
2. click on the `View & Edit` at the new installed agent, where a Form with a JSON configuration is be presented.
3. Scroll down the JSON in the "ips" section and set your own parameters, read below for examples
Below are the JSON configuration examples for each supported device.
## Sophos
```json theme={null}
"ips": {
"sophos": {
"active": true,
"user": "",
"password": "",
"address": "",
"command": "bash artifacts/sophos/update_blacklist_sophos.sh"
}
}
```
## Checkpoint Secure XL
```json theme={null}
"ips": {
"checkpoint_securexl": {
"active": true,
"connections": "@",
"password": "",
"command": "bash artifacts/checkpoint/install-securexl.sh",
"vsids": ""
},
}
```
***
## 2. Download Configuration
Prepare a **virtual machine** with **Docker** and **Docker Compose** installed.\
Download the `docker-compose.yml` file from the previous step and place it on the newly created machine.
This configuration file contains the necessary parameters (including your certificate) that allow the agent to securely connect to your OneFirewall Server.
To start the Agent, simply run the following command:
```bash theme={null}
docker-compose up -d
```
## 3. Setup Access
1. Navigate into the `Agent Status` page from the menu, where you can find the list of all installed Agents.
2. click on the `View & Edit` at the new installed agent, where a Form with a JSON configuration is be presented.
3. Scroll down the JSON in the "ips" section and set your own parameters, read below for examples
Below are the JSON configuration examples for each supported device.
## Sophos
```json theme={null}
"ips": {
"sophos": {
"active": true,
"user": "",
"password": "",
"address": "",
"command": "bash artifacts/sophos/update_blacklist_sophos.sh"
}
}
```
## Checkpoint Secure XL
```json theme={null}
"ips": {
"checkpoint_securexl": {
"active": true,
"connections": "@",
"password": "",
"command": "bash artifacts/checkpoint/install-securexl.sh",
"vsids": ""
},
}
```